Mininet supports research, development, learning, prototyping, testing, debugging and any other tasks that could benefit from having a complete experimental network on a laptop or other pc. The most significant part in Mininet is about starting process in Mininet.
Download and install Mininet in Ubuntu
First, you need to download the Mininet package.
Download the Mininet package from the following url ,
https://github.com/mininet/mininet
To install Mininet in Ubuntu, open the Ubuntu terminal window and execute the following command lines,
cd mininet/util
sudo ./install.sh -a
Start Mininet
To start Mininet Command line interface (CLI), execute the following command line,
sudo mn
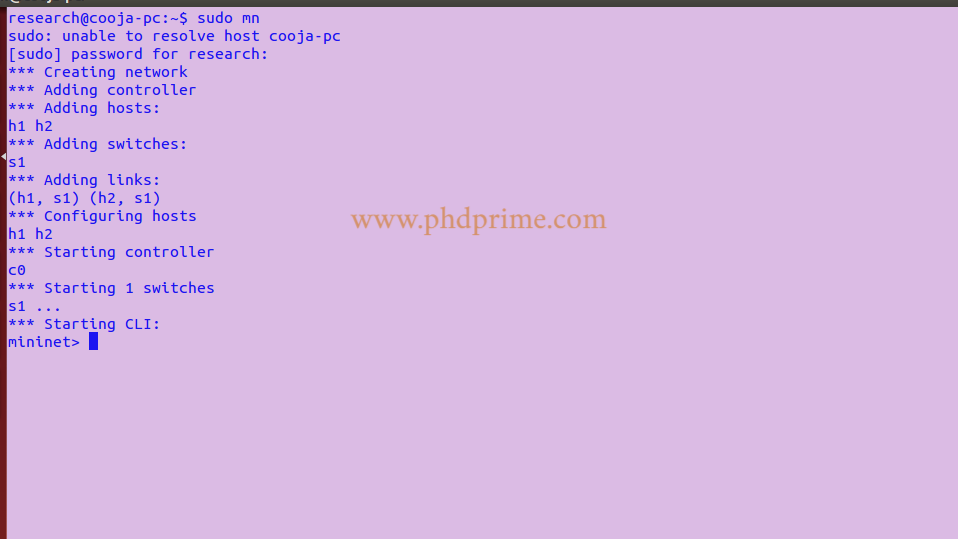
During the start process of Mininet, We should check the installation of Mininet and create a simple topology and that consists of one switch (S1) and two hosts (h1, h2).
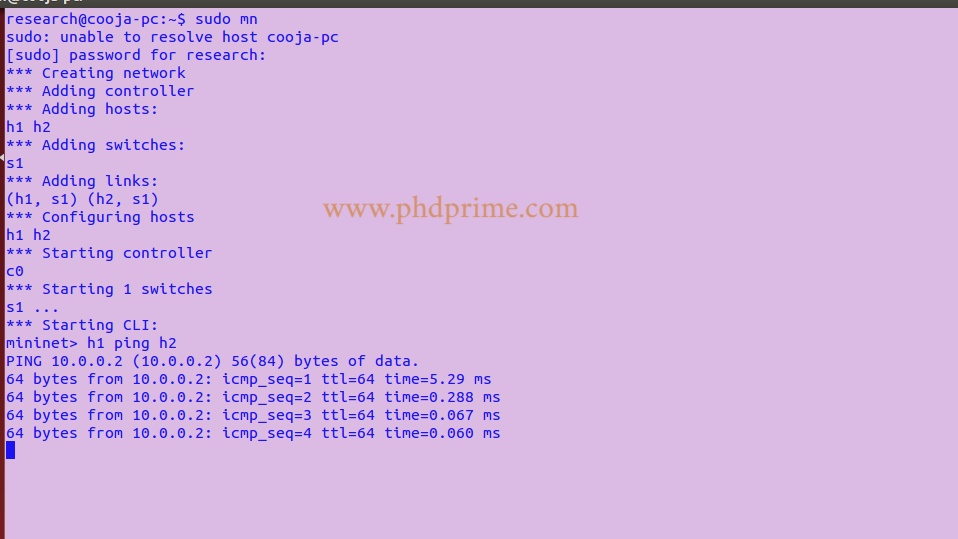
And then to get the traffice between the host1 and host2, execute the following command line,
h1 ping h2
Start Miniedit in Mininet
MiniEdit comes with a very simple interface canvas with icon that represents various tools. To open the interface, you have to run the following, which is the interface presented by MiniEdit that includes various tool icons.
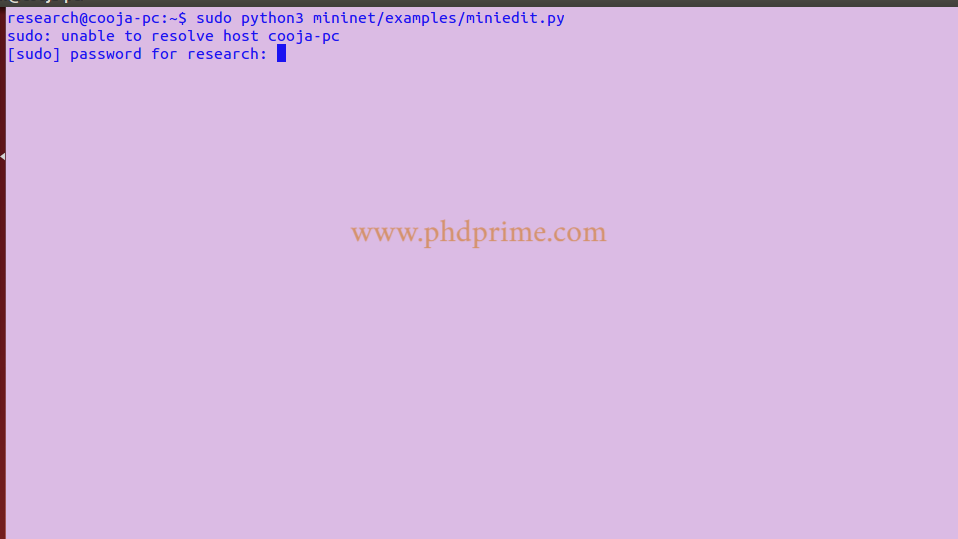
Start Miniedit by entering the following command for create dynamic network topology and execute the already created simulation files,
sudo python3 mininet/examples/miniedit.py
Start MiniEdit in Mininet ,
To this end, our research experts provided the noteworthy process to start Mininet.
If you have any queries, contact us to clarify that.


